We already spoke on Segment Journeys, the other type of Journey that is quite powerful is Trigger Journeys. A trigger journey executes when “something” happens.
To start with, before you even create your Trigger Journey, you will need to create a “Trigger” that defines what your journey is going to act on.
In my case, I created an event, and I want a trigger to run when a user has registered for our event.
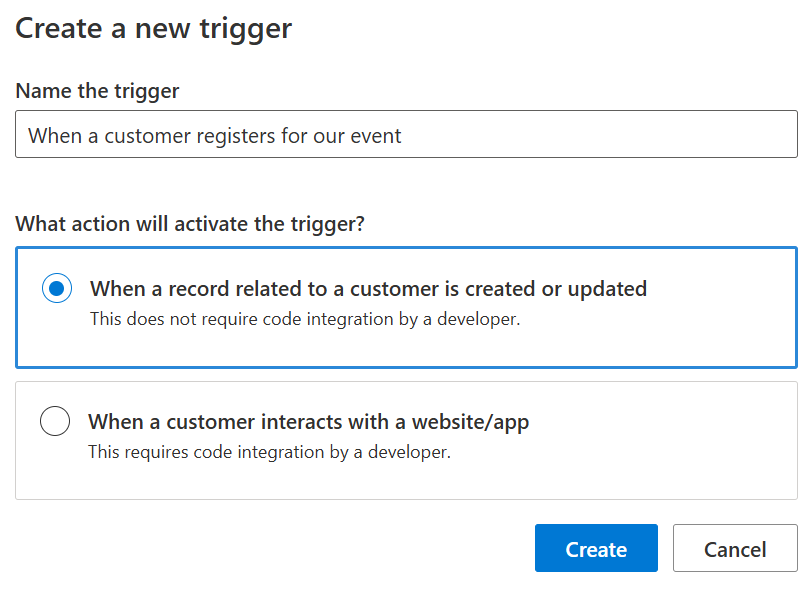
If you have worked with plugins, the workflow below seems pretty similar as you identify the table and field you want to trigger on, and when you want the trigger to occur.
Note: I am going to leave the “Integration with a website/app” journey for now, as this is a larger topic.
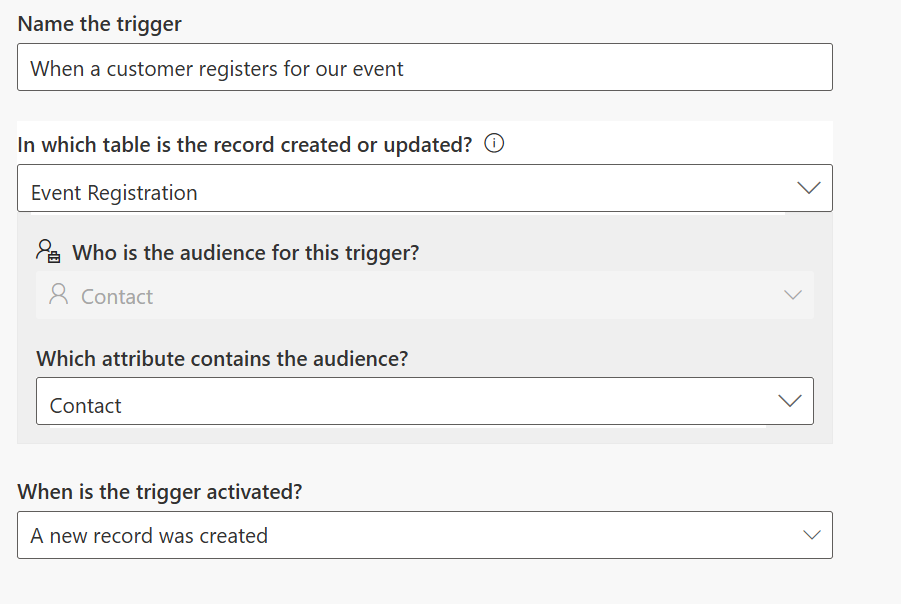
For my trigger, I am going to keep it to “A new record was created”, but I could change this to occur when a registration was updated (perhaps the user changed their status) and/or both.
When complete, I will select “Ready to Use” in the top right and be good to start using this trigger in our journey.
Creating the Journey
With my trigger complete, I can now create my journey by choosing my trigger and then adding a condition to it. In this case, I localized the trigger to my “event”, but if I wanted the same trigger to apply to all my events (maybe all my emails are the same), I would leave the condition field blank.
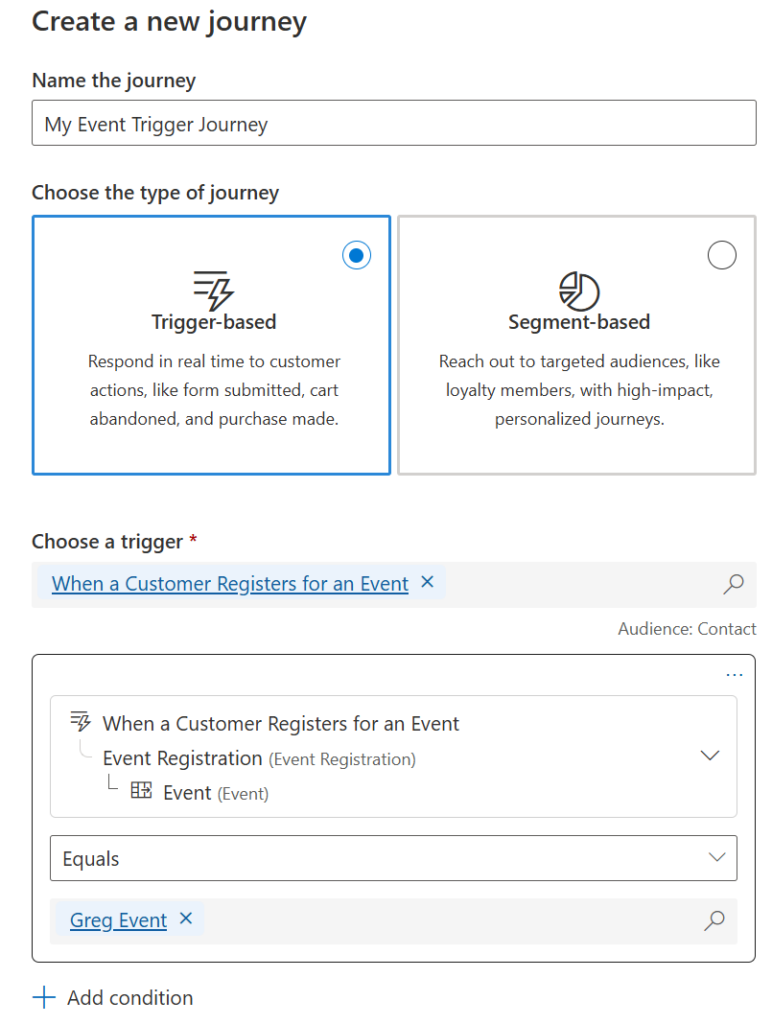
From here I can click “Create” and am now ready to work on my journey, similarly to how I would work with a segment journey.