
Similar to the posts I’ve written about creating Webhooks for AzureDevOps and Git, you can do the same for Jira.
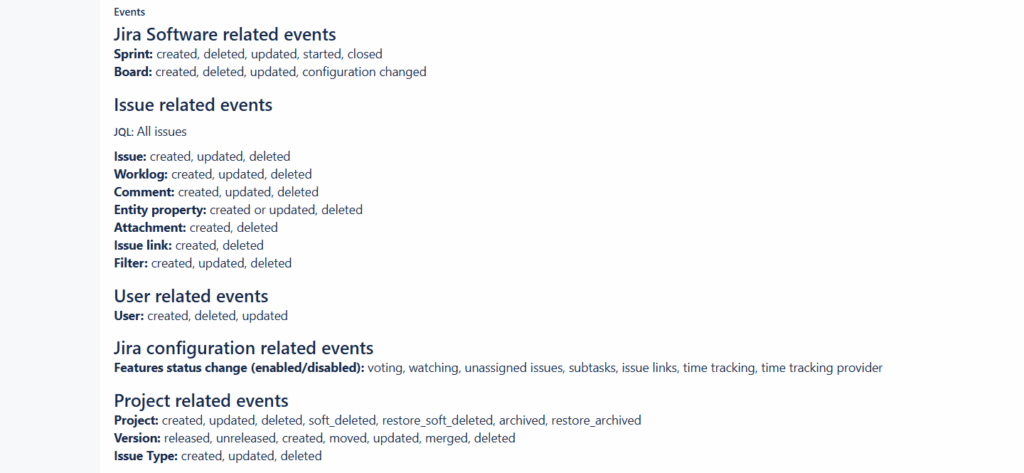
To get started, you need to navigate to System Settings and then down to Webhooks. The amount of information and events that you can extract from JIRA is quite significant. In the below screenshot, I probably don’t do it justice.
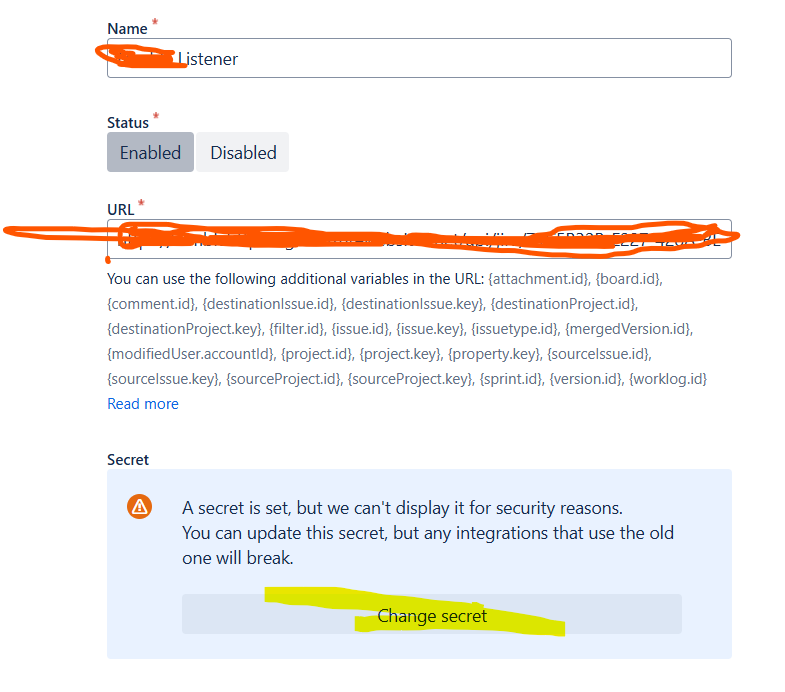
I’ve skipped over it to this point, but it should be made very clear that with any Webhook you build, you want to make sure there is some level of authorization to ensure that no one is grabbing your webhook and spamming you. The last thing you need is to wake up with your database, queue or service spammed with traffic.
Create a Secret and Don’t Share it!
Of the three systems – Azure DevOps, JIRA, and Git – JIRA is definitely the most verbose when it comes to not only the size but overall structure of data in the Webhook. As well, there is more inference that needs to be done there in order to understand what the fields are and how to use.
If using C#, a simple Http Azure Function will suffice to get access to the JSON request.
    [Function("JIRAWebHook")]
    public async Task<HttpResponseData> RunAsync([HttpTrigger(AuthorizationLevel.Anonymous, "get", "post", Route = "jira/{Id}")] HttpRequestData req, string Id)
    {

        var response = req.CreateResponse(HttpStatusCode.OK);
        return response;
    }
Similar to Git, I do like the fact that JIRA has events description and why the webhook was fired right at the top of the output.
