Azure DevOps is great for managing your team and ensuring everyone is working on the right thing, at the right time. Its simple-to-use interface and base customization layer is a great way to ensure you can get up and running quickly.
However, depending on your workflow, there will be times when you will want to access data from Azure DevOps outside of that environment (i.e., perhaps trigger a Power Automate Flow to run from an action in DevOps). To accomplish this, we use Webhooks.
The simplest way to build a webhook is to set up an Azure HTTP Function and deploy it. When looking at the structure of your Function, it doesn’t need to be anything complicated; all we want to do is output the “req” parameter that shows us the data being requested.
        _logger.LogInformation($"C# AzureDevOps HTTP trigger function processed a request with data {req}.");
        var response = req.CreateResponse(HttpStatusCode.OK);
        return response;
Next, you can publish and deploy your Webhook, make a note of the URL, and copy it.
Note: For our tests, ensure that the AuthorizationLevel of the function is set to Anonymous. You can ratchet this down later on, but for now, we are only testing this.
Note: If your Webhook does not exist at the time of configuration, you will be able to configure it, but will not be able to test it.
Creating the Webhook
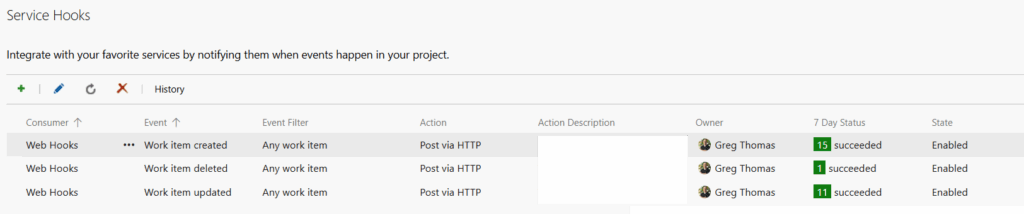
Navigate to your AzureDevOps and ensure you have permissions to access “Project Settings” and you’ll see a heading under Generall called “Service Hooks”.
Unfortunately, there is no way to configure a Webhook on an Organization (which would simplify things), so we need to do it on a per Project Basis.
You’ll come to a page like this where I already have some Webhooks running. Of interest, you can see how well the hook integration is running over a 7 day period.
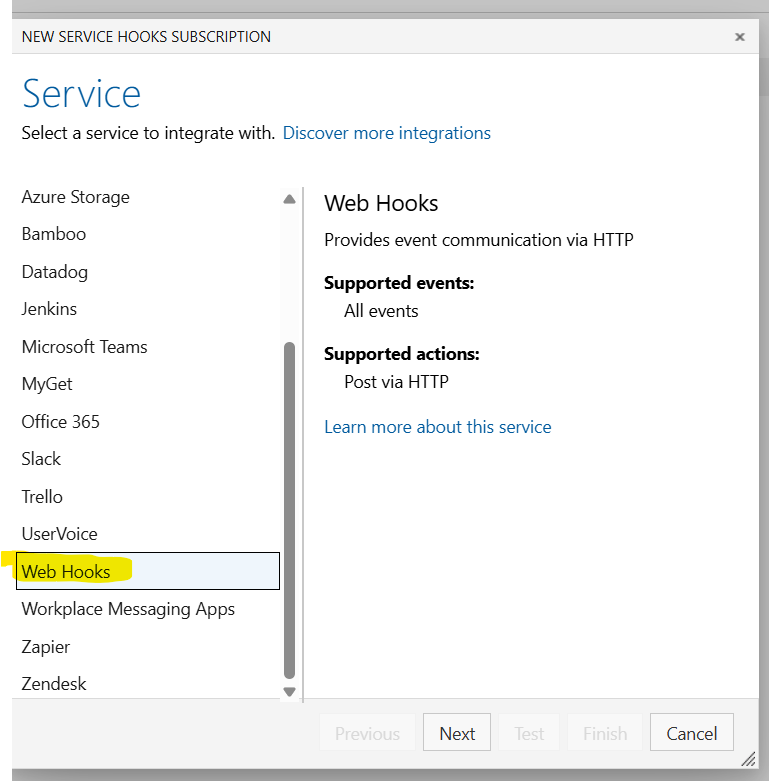
Click the “+” sign in the top left corner, from here you will select “Web Hook” and then click “Next”.
Configuring the Webhook
AzureDevOps has a very extensive library of options from which you can configure a Webhook for – from Alerts to Pull Requests to Repository configuration – any action you need, you can have a trigger created for it. The below example highlights a work item being created.

It’s important to note the filters that can be put in place to minimize exactly what you want your service to receive events on. For now I have left as blank, but in the case where you wanted certain events to go to another system you could reduce the load by specifying the work item type and tag (i.e., Bugs of Tag “Production Outage”).
The Webhook Actions
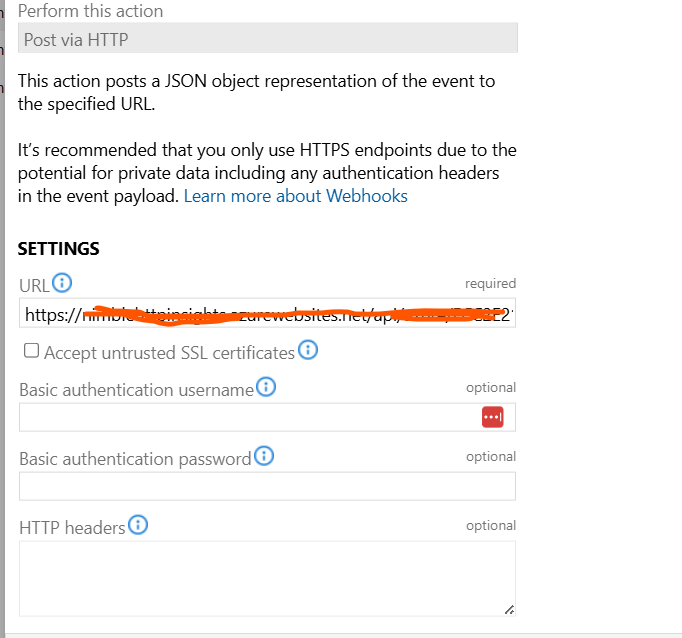
Here is where we will put in the URL to our webhook, there are many options to increase security in what you call in this hook, from additional headers, basic authentication and SSL certificates.
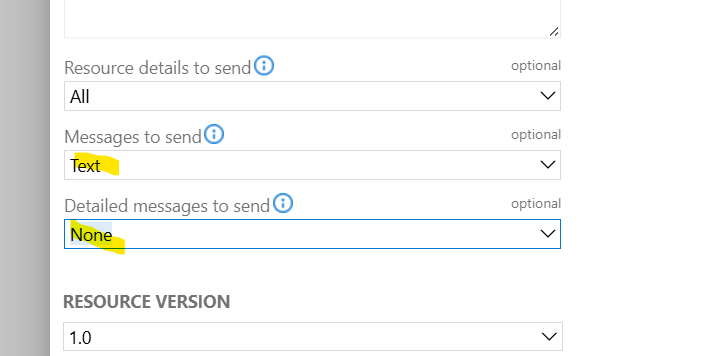
Just as important is configuring what you will receive in the Webhook. Diving into the below is a post of its own, with the difference between all this information being exactly how much data you are sending across.
You might want to play around here to determine exactly what you want to receive and what your application needs. If you don’t need all of the message data, configure these options to reduce traffic into your system could save you bandwidth and processing time.
Testing the Webhook
Once you have finished configuring the Action for your Webhook, you will notice a “Test” button at the bottom of the screen. When you click this button, another screen will appear where the system tries to reach out to your Webhook to call it.
When you click Test, an event that simulates your hook will be created, and your endpoint will be called. If it can be reached, you will see a “Succeeded” response indicating communication was successful and the event triggered.
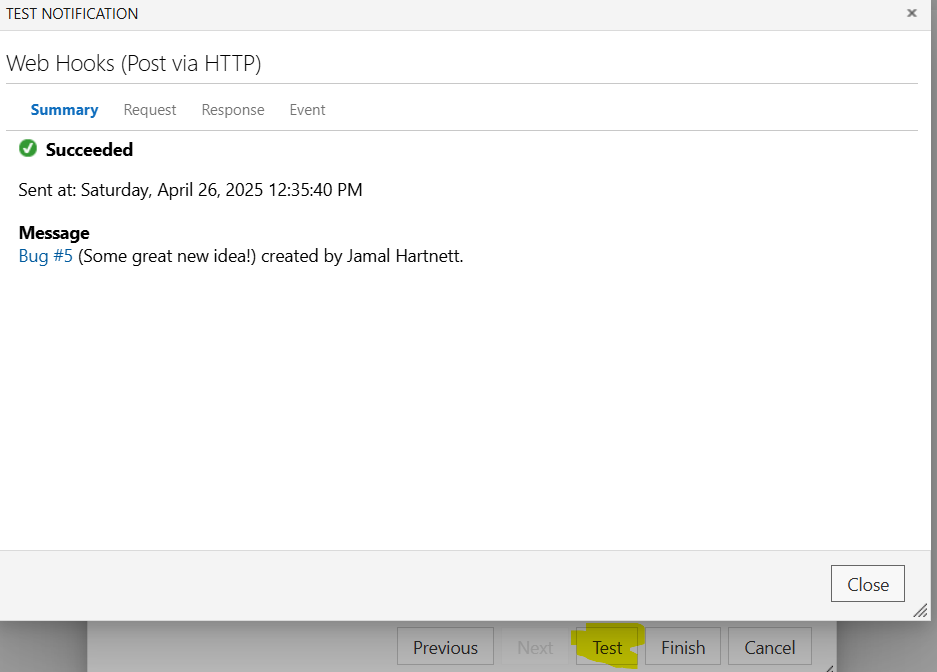
If all goes fine, you should see a response in your HTTP endpoint.
Troubleshooting Webhooks with Azure DevOps
In creating Webhooks with Azure DevOps, I have only run into the following issues (rather consistently) when configuring them.
Can’t Authenticate (401)
If your endpoint is not open to anonymous traffic, your hook will not be able to reach it.
Not Firing After Creation
Generally, this is a result of performing an action that doesn’t trigger your endpoint. For me, this happens when I try to get too concise with my endpoints and end up eliminating myself from my own hook.
Cannot deploy your service locally
As AzureDevOps is hosted externally (not Azure DevOps Server), you can’t use localhost for your endpoint, it doesn’t understand it. You’ll need to get some free azure credits or some hosting space to host your endpoint on.