Email remains the one source where we all struggle to get what we want out of it. We all have FOMO (fear of missing out) when it comes to our inbox. I have blogs that sit there begging for me to open them.
And yet we shy away from turning our email over completely to AI that might not know how we are feeling that day and what might pique our interest.
There are a few things you can do to automate your (and your teams) inboxes with Power Automate.
Auto Categorization
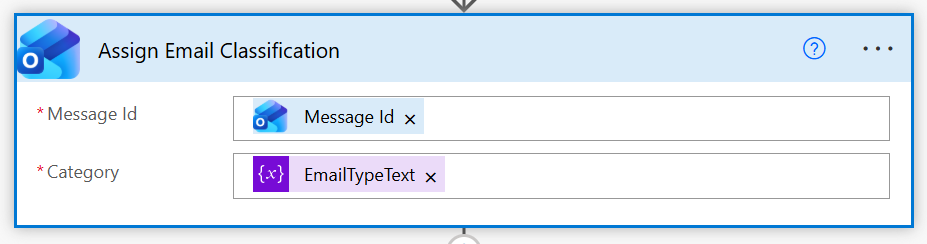
If you have the “general” office account that gets flooded with emails, you could definitely benefit from categorizing your emails into folders and categories. It doesn’t get rid of the email, but puts it somewhere you can review later. You can do this by assigning a category to your email in your flow that already exists in that inbox.
Something as simple as color-coding your categories is a great way to clean up the inbox.

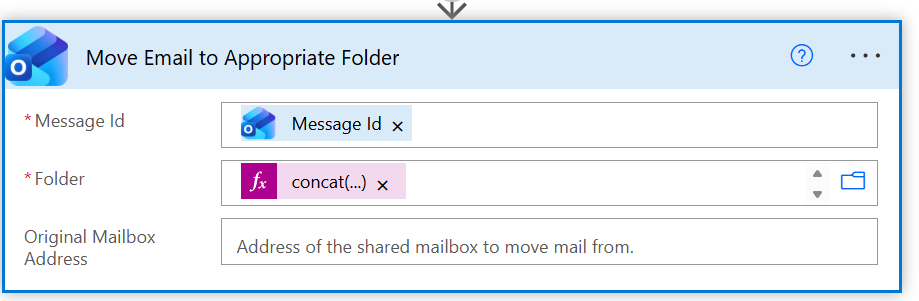
More importantly, moving it to a folder that exists will keep the inbox clean.
What I generally recommend to customers implementing this kind of automation is to implement a category called “Processed By…” so that the user knows which process handled the email automation.
Writing Drafts
Oftentimes, when looking at stats, what matters more than anything is the context – what about this matters, and because of that, generally, you don’t want to always automate summary mails going out.
A solution that easily slips into a user flow is to have your automation construct the email and put it into the user’s drafts folder so when they are ready to send, they can edit it before sending it out.
To accomplish this you only need two things;
- An Application that can act on behalf of someone’s email account.
- The user’s account you are going to send to.
We’ll be using the Graph API for this, so in creating your app, the first thing you are going to do is create the app to connect to Graph. When creating the app you’ll need these permissions granted.

Mail.ReadWrite — Application permission
- Allows the app to read and write mail in all mailboxes in the tenant, with no user signed in
- Requires admin consent because it’s tenant-wide access — any mailbox, any user
User.Read — Delegated permission
- Allows the app to sign in a user and read their own profile only
- Does not require admin consent — the user themselves can consent at login
- Typical use: any app that needs to know who is logged in (name, email, photo, etc.)
Mail.ReadWrite has some heavy application permissions that allow you to access all inboxes, which you don’t want to do. In this case, what you can do is create an ApplicationAccessPolicy in Exchange that restricts the permissions and access you are looking to grant. More details on ApplicationAccessPolicies are available here – https://learn.microsoft.com/en-us/powershell/module/exchangepowershell/new-applicationaccesspolicy?view=exchange-ps
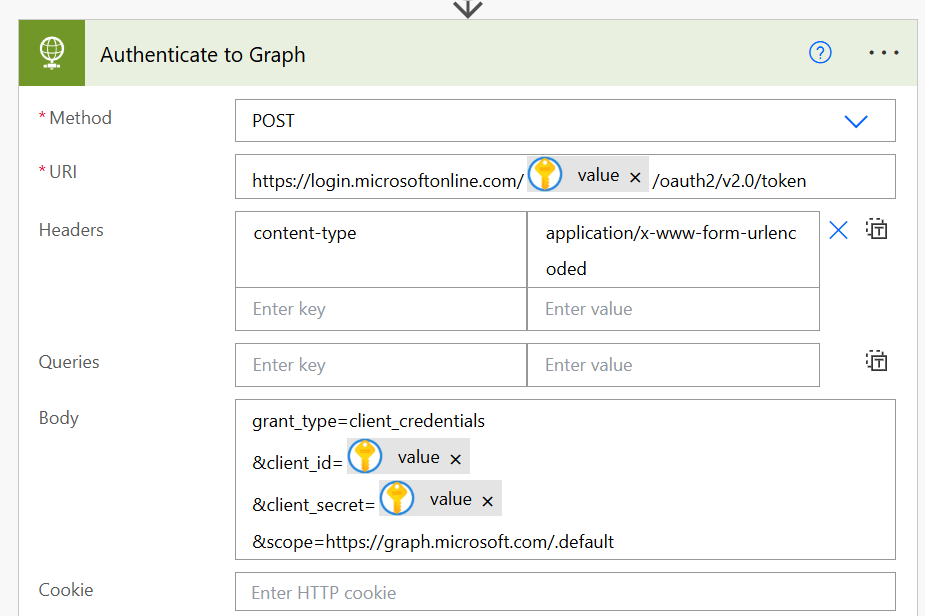
Once you’ve created and secured your app, it’s back to Power Automate to set up a connection to Graph and work our magic. There is no Graph connector per se, but what you can do is use the HTTP connector to make the connection.
Here I am also pulling directly from Key Vault which is a great way to reduce unintended access to these secrets.
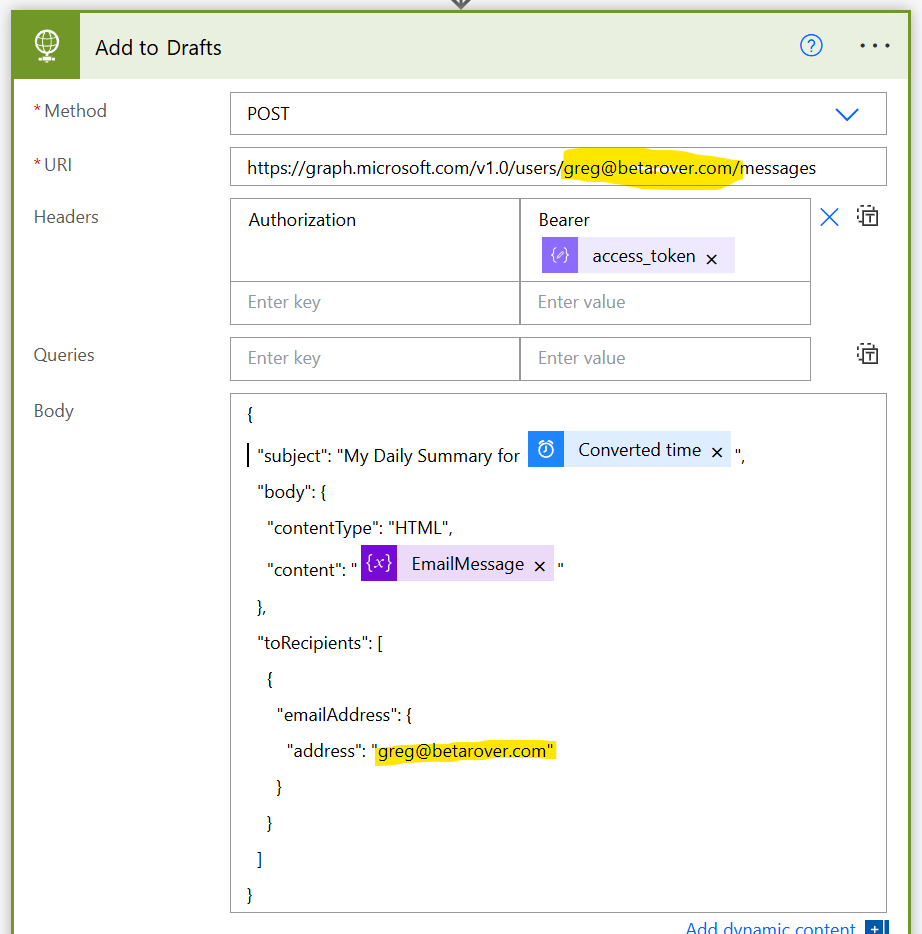
Once you’ve established your connection to Graph, you can now do the fun work of adding your email to that user’s inbox.
The key parts below are the URI you are calling, which says that this is “Greg’s” inbox (i.e., where the draft email will be stored). Followed by any additional information you want to add about the email – i.e., Subject, Body, and who it is pre-addressed to.
Generally, when I do the above, I’ll send the user a quick notification via Teams that the email has been generated as a quick prompt for them to go and look at it.